

Active Thermal Management
The trusted name in thermal protection
SEC-1 Installation Instructions (Click here to check or download the PDF File)
IMPORTANT – Read completely BEFORE beginning!
While not difficult or complicated, installation of the Small Enclosure Cooler (SEC-1) does include steps which require basic woodworking skills and tools.
Please read the entire installation procedure and determine that you are comfortable performing the tasks outlined before proceeding. If you are not, either arrange for installation by another party, or return the SEC-1 to its place of purchase.
Tools Required
- Tape measure
- Sabre saw
- Philips screwdriver
- Pencil and/or marking pen
- Electric drill
- Drill bit(s) slightly larger than sabre saw blade
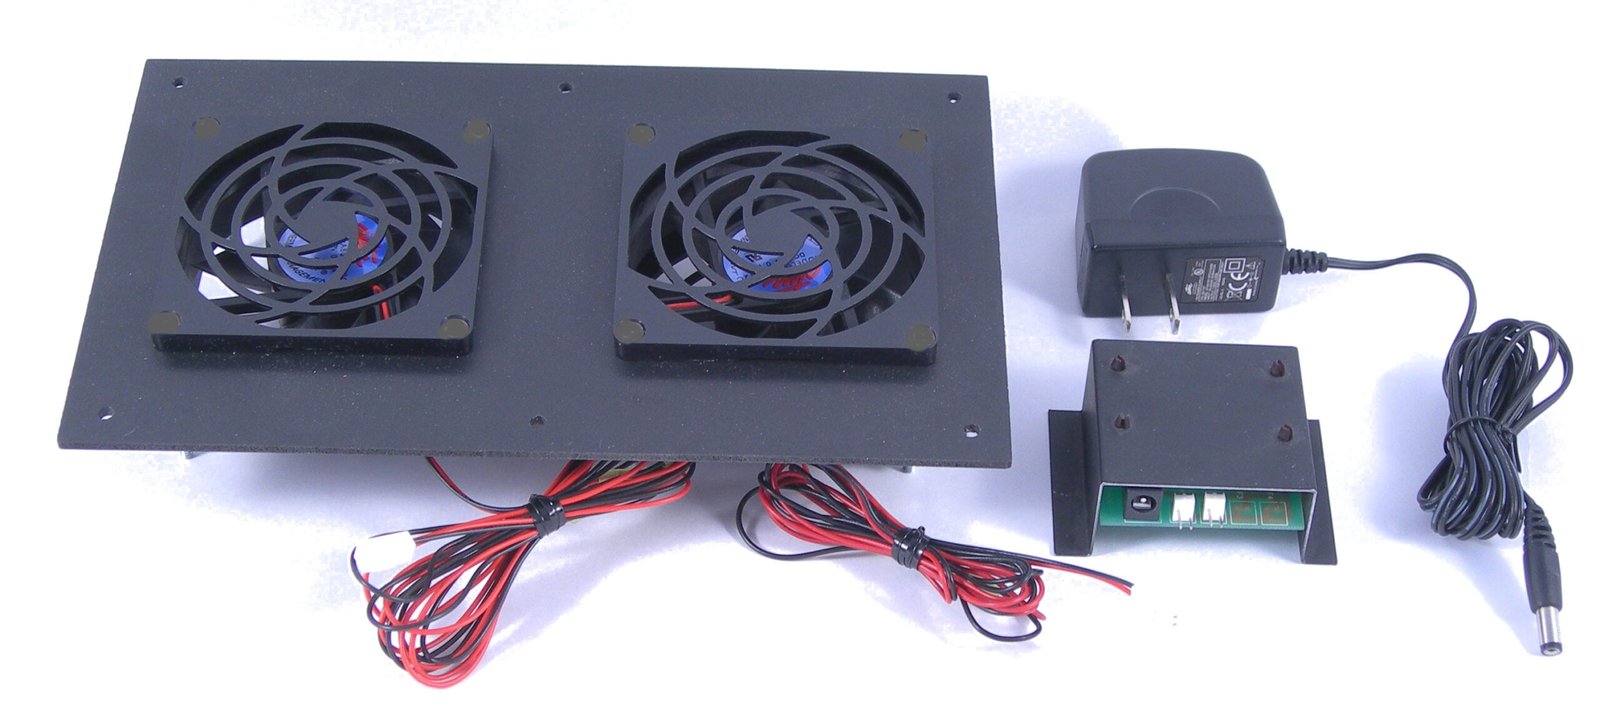
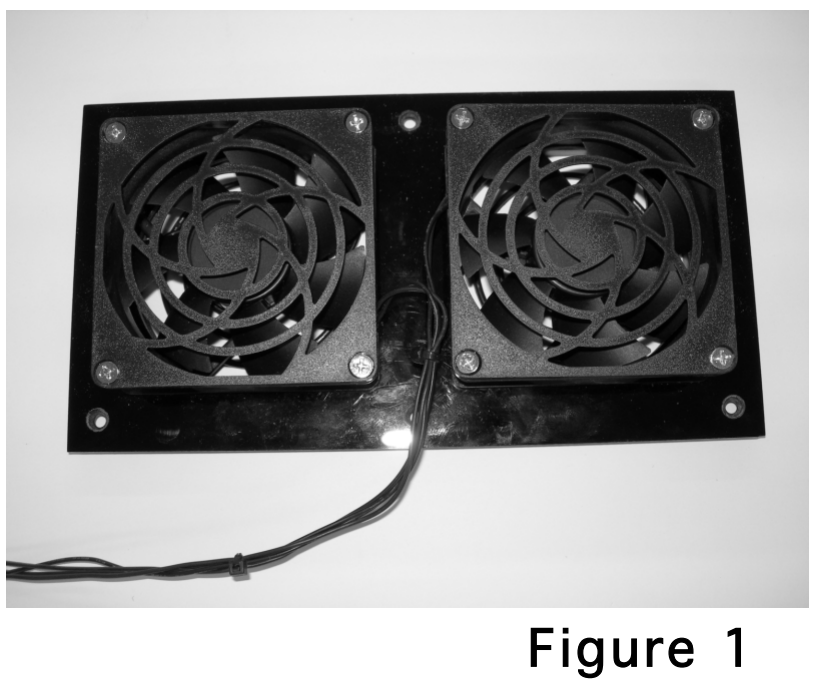
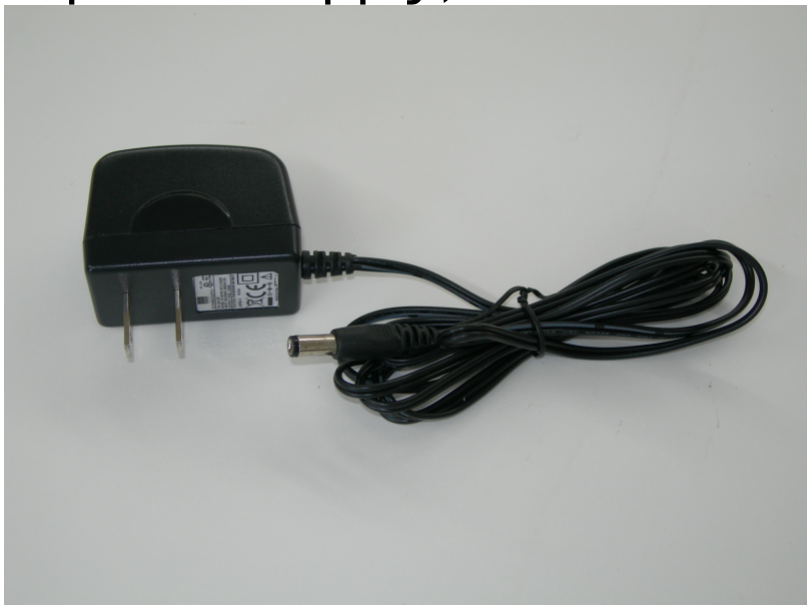
Included in the SEC-1 Package
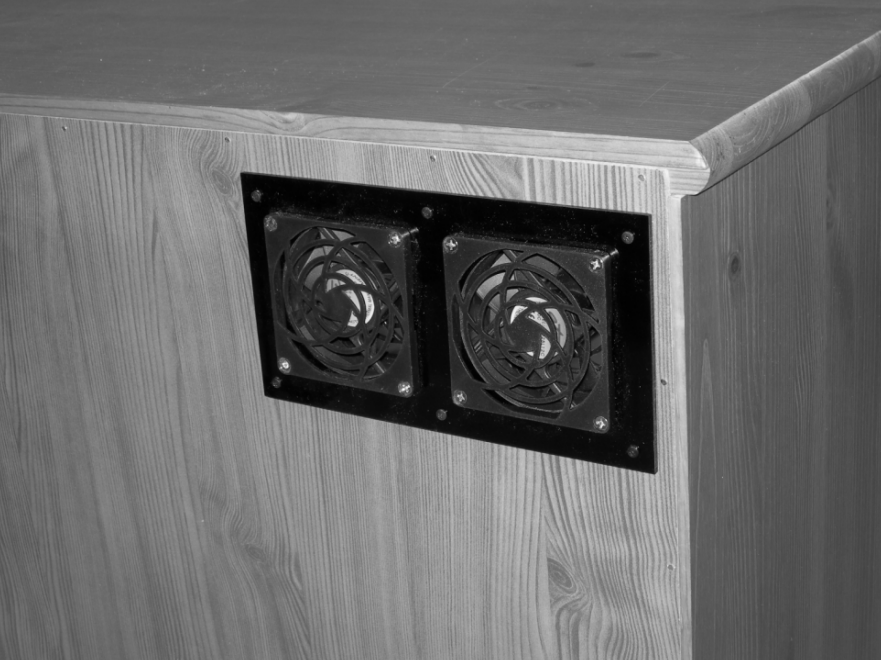
- Fan panel (Figure 1)
- Power supply (Figure 2)
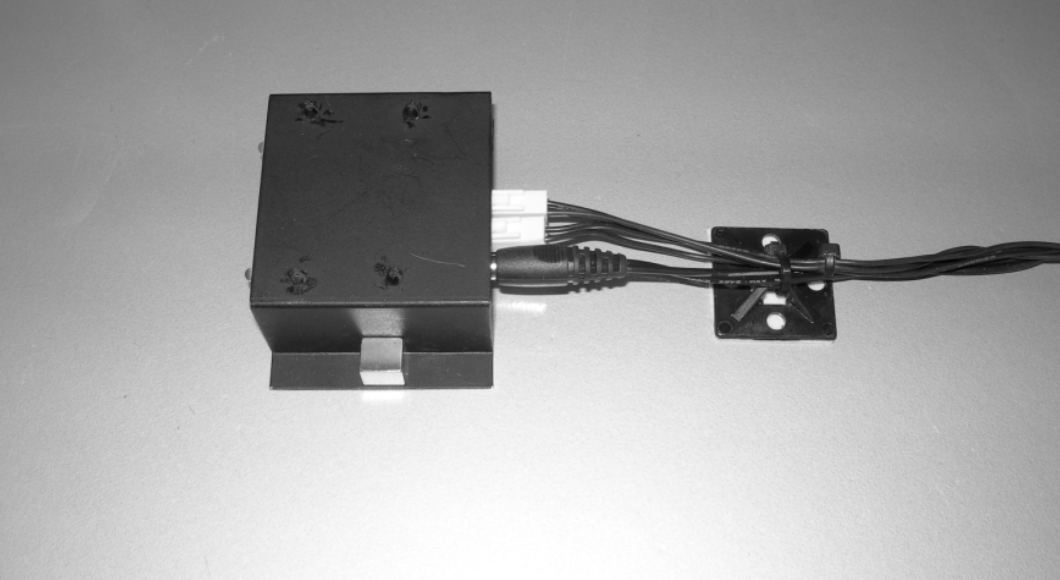
- Thermal control assembly (Figure 3)
- Screws for fastening the fan panel
- Wire ties and wire tie anchors
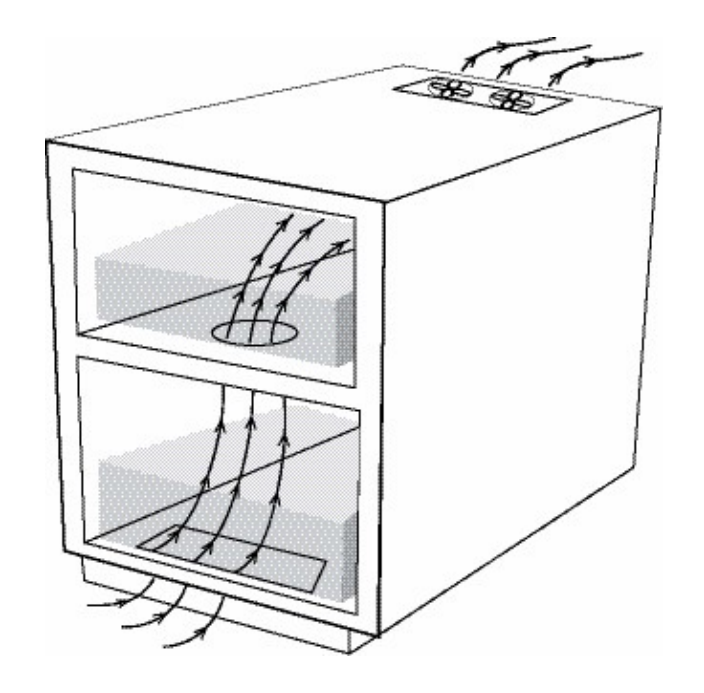
The SEC-1 is designed for installation in an enclosure or cabinet up to about 12 cubic feet in volume (approximately 2’ × 3’ × 2’ with no more than 1 shelf), or a small section of a larger enclosure.
It can cool several pieces of audio-video equipment such as:
- Cable box (or satellite receiver)
- Multi-channel amplifier
- 1 or 2 other items which do not generate significant heat
⚠️ Note: It is NOT intended to cool large enclosures with many pieces of equipment or more than one device that runs extremely hot.
Quick Overview of Installation
- Mount the fan panel.
- Provide an opening for fresh air to enter the cabinet.
- DO NOT begin installation until the locations of the fan panel and fresh air opening are determined!
- Place the thermal control assembly on the device to be monitored.
- Plug the fan and power supply plugs into the mating connectors on the thermal control assembly.
Operation
When installed properly:
- Fans will remain on at a slow speed at all times to remove heat generated by “always-on” devices.
- When the temperature of the monitored component reaches 86–90°F, the fans switch to a higher speed.
- A green LED on the thermal control assembly remains lit, indicating that the SEC-1 is receiving power.
⚠️ Note: Effectiveness depends on enclosure design, airflow, and heat generation.
It is the responsibility of the owner/installer to ensure adequate ventilation.
ATM shall not be liable for incidental, special, or consequential damages.
Detailed Installation Instructions
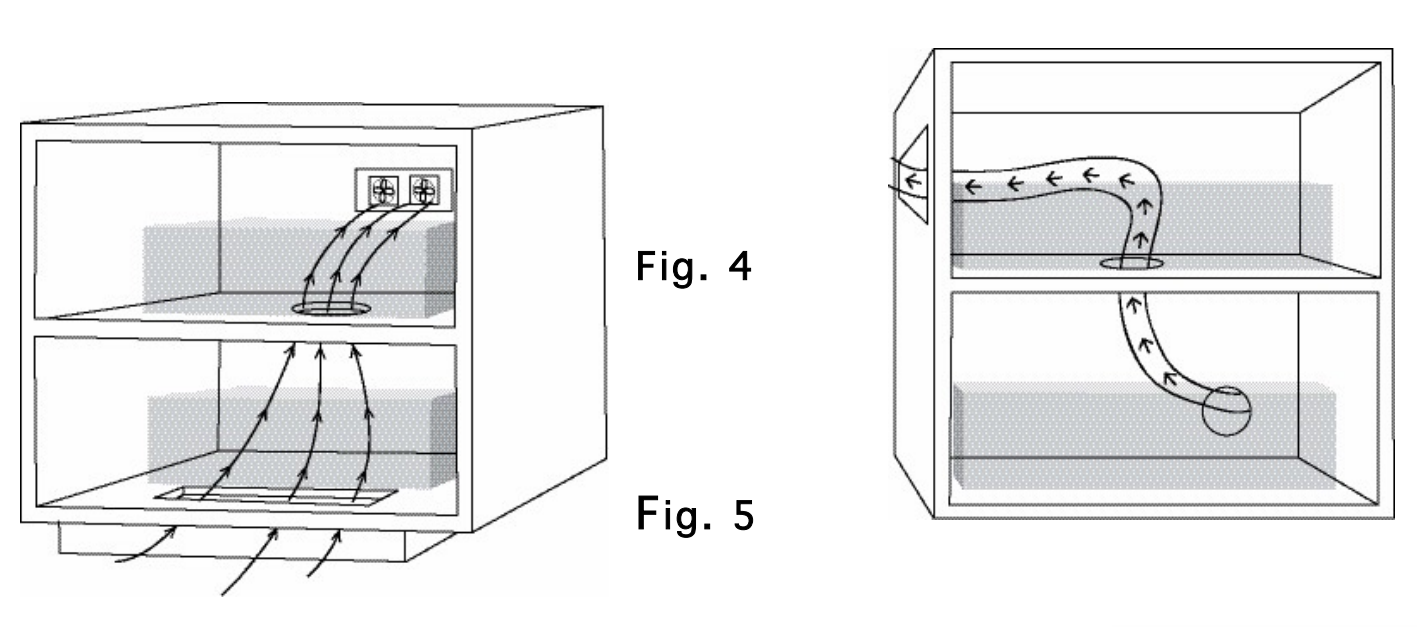
- Determine fan panel location.
- Mount as high and rearward as possible (labels on fans normally face outward).
- Fans have 38” wires for flexibility.
- Options: rear panel, side, top, or cabinet floor (see Figures 4–8).
- Provide a fresh air opening.
- Minimum size: 10 sq. in. (e.g., 2” × 5”, 1” × 10”, or two 3” round holes).
- Locate low in front of the enclosure for best cooling path.
- Ensure airflow passes through equipment, not directly from inlet to exhaust.
- Drill additional shelf holes (e.g., two 3” or one 4”) to allow air passage.
- Mount the thermal switch assembly.
- Place on the hottest component.
- Magnets hold it to steel covers; use wire ties for aluminum covers (Figure 9).
- PCB floats slightly to ensure switch touches equipment top.
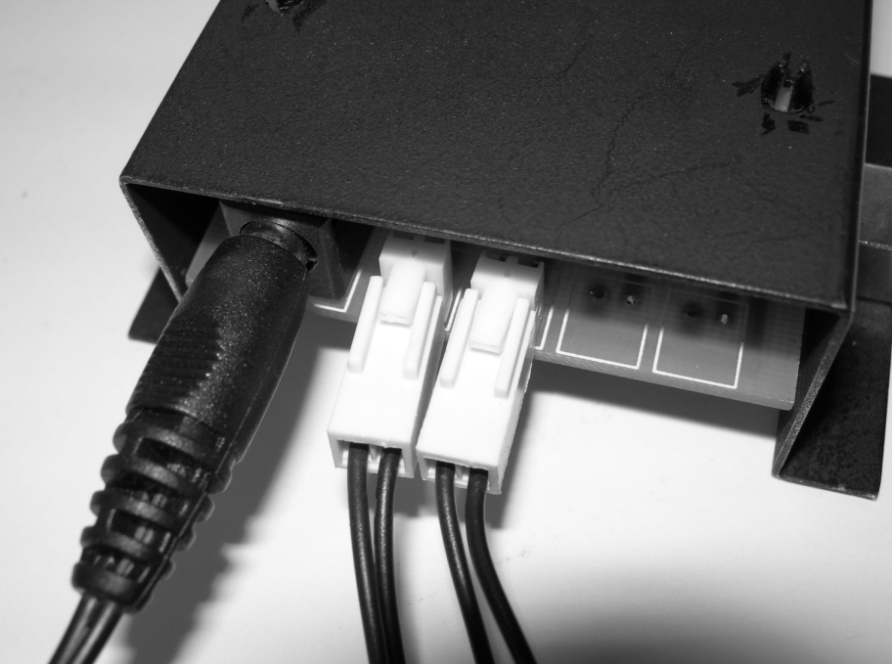
- Connect power and fans.
- Plug power supply into the thermal switch assembly.
- Plug fans into 2-pin connectors (Figure 10).
- Use an outlet that is always live (not switched).
- Preferably use the same circuit as the hottest equipment.
Troubleshooting
- Fans not turning:
- Check green LED.
- Verify power supply connection.
- Ensure thermal switch placement is correct.
- Fans turning but enclosure hot:
- Verify adequate fresh air inlet.
- Test by heating thermal switch with hair dryer; fans should speed up.
- Ensure thermal switch is placed on the hottest part.
Warranty
Active Thermal Management (ATM) warrants the SEC-1 against defects in materials and workmanship for 1 year from date of purchase.
Warranty covers:
- Repair or replacement of defective product (with return authorization and proof of purchase).
Warranty does NOT cover:
- Shipping damage (file with carrier).
- Improper installation or electrical voltage.
- Modified units.
- Damage from corrosion, abrasion, immersion, or extreme temperatures.
- Abuse, misuse, abnormal usage, or accident.
⚠️ No other warranties apply. ATM is not responsible for consequential or incidental damages including property loss, profit loss, installation costs, or personal damage.
25570 Rye Canyon Rd. Suite D
Valencia, CA 91355
Phone: 661-294-7999 (voice)
Fax: 661-294-1115
Email: techinfo@activethermal.com
Website: www.activethermal.com